ZSH
Install and set up zsh as default
- With the package manager of your choice, e.g.
sudo apt install zshorbrew install zshfor macOS - Verify installation by running
zsh --version. Expected result: zsh 5.0.8 or more recent. - Make it your default shell: chsh -s $(which zsh)
- Log out and log back in again to use your new default shell.
- Test that it worked with
echo $SHELL. Expected result:/bin/zshor similar. - Test with
$SHELL --version. Expected result:zsh 5.8or similar
Adding an Oh-my-ZSH addon
While you’re at it, you can also install the most popular Zsh plugin, oh-my-zsh, that comes with many built-in plugins and themes using this install script:
sh -c "$(curl -fsSL https://raw.githubusercontent.com/robbyrussell/oh-my-zsh/master/tools/install.sh)"
Install Powerline fonts
$ git clone https://github.com/powerline/fonts.git
$ cd fonts
$ ./install.sh
Change the Theme to “agnoster”
$ nano ~/.zshrc
Set ZSH_THEME="agnoster" and save the file
Install zsh-autosuggestions
- Install the zsh-autosuggestions
$ git clone https://github.com/zsh-users/zsh-autosuggestions ${ZSH_CUSTOM:-~/.oh-my-zsh/custom}/plugins/zsh-autosuggestions
- Add plugin in ~/.zshrc
$ nano ~/.zshrc
...
plugins=(git)
plugins=(zsh-autosuggestions) # Add this line. under the "plugins"
$ source $ZSH/oh-my-zsh.sh
- Refresh the terminal.
Click the tiny refresh icon on the left side of the terminal tab.
- Enter ls
Then you can see that -al is automatically printed.

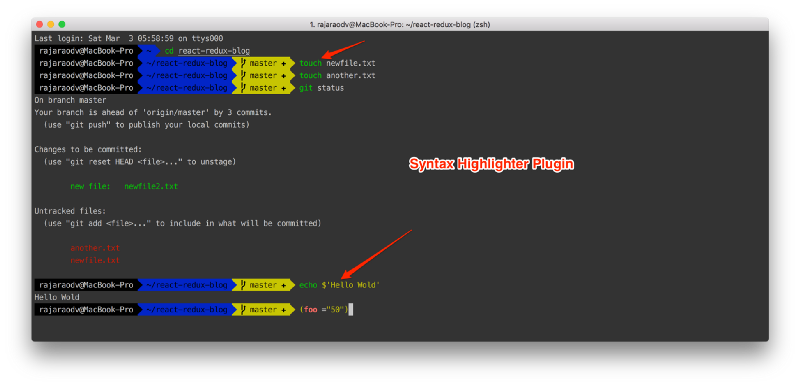
Add Syntax Highlighting Plugin
The Syntax Highlighting plugin adds beautiful colors to the commands you are typing as shown below.
- Clone the zsh-syntax-highlighting plugin’s repo and copy it to the “Oh My ZSH” plugins directory.
git clone https://github.com/zsh-users/zsh-syntax-highlighting.git ${ZSH_CUSTOM:-~/.oh-my-zsh/custom}/plugins/zsh-syntax-highlighting
- Activate the plugin in
~/.zshrcby addingzsh-syntax-highlightingto the Plugins section as shown below.
- Re-read zshrc configuration
source ~/.zshrc
Useful zsh commands
-
take— создать директорию и сразу в неё войти (mkdir xxx | cd xxx) -
комманда, а затем стрелки вверх и вниз — история конкретной комманды
-
ctrl+r— поиск по истории -
Необязательно писать
cd, чтобы войти в директорию -
Mass rename files with
zmv. To install zmv, runautoload zmv. I downloaded a lot of images for a machine learning model and wanted to rename them to be more consistent (ie. epcot-1.jpg, epcot-2.jpg, epcot-3.jpg… instead of 1.jpg, 2.jpg, 3.jpg…) The command to do so would bezmv '(*).(jpg|jpeg)' 'epcot-$1.$2'
To check what would happen before running the command, you can add -n, instead running
```
zmv -n '(*).(jpg|jpeg)' 'epcot-$1.$2'
```
What does that command mean? (*).(jpg|jpeg) finds each file in the directory that ends in either .jpg or .jpeg. Then epcot-$1.$2 says to edit each file name by prepending epcot- followed by the original file name (represented by $1) and then the original file type (with $2).
zcalc— простой калькулятор командной строки